Getting started
About ten minutes from first launch to a model answering in your editor, most of it the model download.
1. The scan
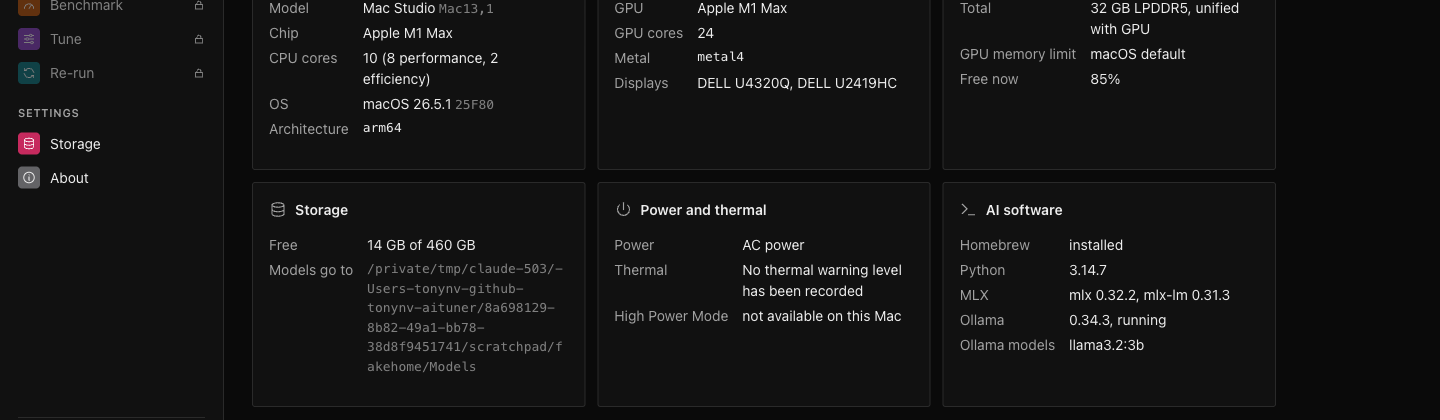
Every launch starts with a live scan of your Mac. Each line is a real detection command with its timing; the profile at the end shows the machine, chip, cores, memory, storage, power and installed runtimes. Press Return, or wait a moment, to continue to Hardware.
2. Bootstrap
Open Setup and press Bootstrap. It lists exactly what it will do, then does it after you confirm:
- Create your models, reports and knowledge base folders if they do not exist (change them first in Storage if you want them elsewhere).
- Install or update MLX and mlx-lm in a private Python environment that belongs to aituner.
- Install macmon with Homebrew for live power and temperature readings.
3. Pick a model
Open Downloads. Discover lists models ranked for your Mac, each with a memory bar that shows the weights, the runtime and how much room is left for context. Search, filter by coding, chat or image, and press Add to queue. Downloads run in the background, one at a time; the Queue shows progress. See Models.
4. Start it
In Setup, choose the model and press Start model. aituner switches to Monitor once it is serving, so you can watch it load and the GPU work.
5. Connect your editor
Back in Setup, choose a tool under Connect your tools. aituner shows exactly what it will install and change, asks once, then sets it up with its own profile and opens it on your project. See Editors and tools.
6. Keep it running
Close the window: aituner and your model keep running in the menu bar. Click the gauge icon for the live model and GPU, or to open aituner again. Quit stops everything cleanly, including the model.